Okay, folks, let’s dive right into this Nissan Leaf charger resurrection project. We’re tackling a Japanese-spec charger here, the part number is TWENTY-NINE THOUSAND SIX HUNDRED NINETY — THREE NK ZERO A, and the main goal is to get this thing working again. The first big hurdle is the plug. It’s completely different from what we’re used to, and frankly, it’s shot. So, we’re going to replace it. This isn’t just a simple swap, though. We need to be incredibly careful because this charger has a built-in temperature sensor. It’s a crucial component for safety and the overall functionality of the charger. We’ll need to carefully remove the old plug, making sure not to damage any of the delicate wiring, especially the wires connected to that temperature sensor. It’s tiny, easily overlooked, and incredibly important. We’ll be using a very fine soldering iron and some high-quality solder to ensure a clean and secure connection. The goal is to make the new plug connection as seamless as possible, mirroring the original factory setup. We’ll be meticulously documenting each step, so you can follow along easily. Pay close attention to the wire colors and their corresponding positions – getting this wrong could be disastrous. We’ll also be using heat shrink tubing to insulate all the connections, providing extra protection against shorts and moisture. This is a precision job, so patience is key. Take your time, double-check your work, and don’t rush this part. A mistake here could mean the difference between a working charger and a potential fire hazard.
Now, let’s talk about the transformer. This is the heart of the charger, responsible for stepping down the voltage to a safe level for the car’s battery. On this particular Japanese model, the transformer is showing signs of wear. We’ll be carefully inspecting it for any signs of damage, such as burnt components or loose connections. We’ll be using a multimeter to test the continuity and resistance of the windings to ensure everything is within the acceptable range. If we find any issues, we’ll need to replace the transformer entirely. Finding a suitable replacement might be a challenge, depending on your location, so we’ll discuss sourcing options and potential alternatives. The process of replacing the transformer is more involved than changing the plug. It requires a good understanding of electronics and some specialized tools. We’ll be taking our time, explaining each step in detail, and highlighting any potential pitfalls to avoid. Remember, safety is paramount when working with high-voltage components. Always disconnect the power before working on any part of the charger. We’ll be showing you exactly how to do that safely and effectively. We’ll also be discussing the importance of proper grounding and the potential risks associated with improper handling. This isn’t a project for beginners, so if you’re not comfortable working with electronics, it’s best to leave this to a professional. But if you’re up for the challenge, and you’re comfortable following along carefully, then let’s get started!
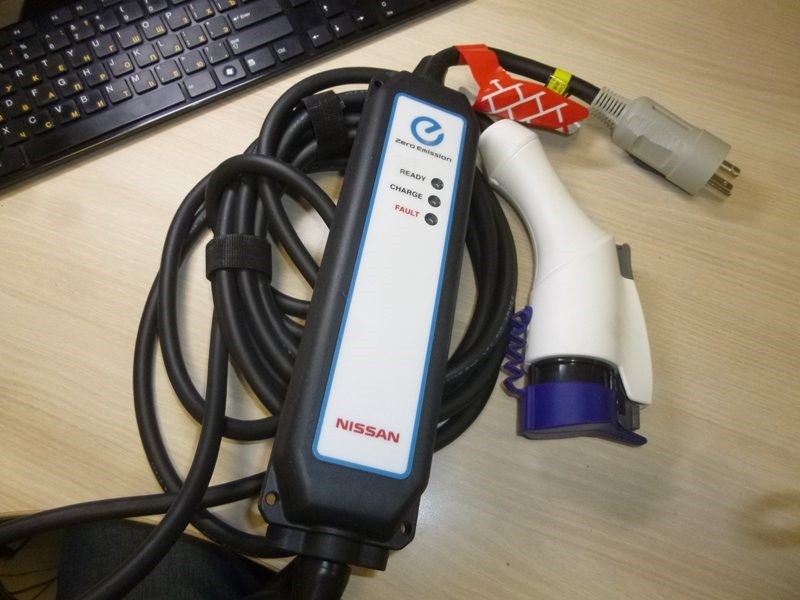
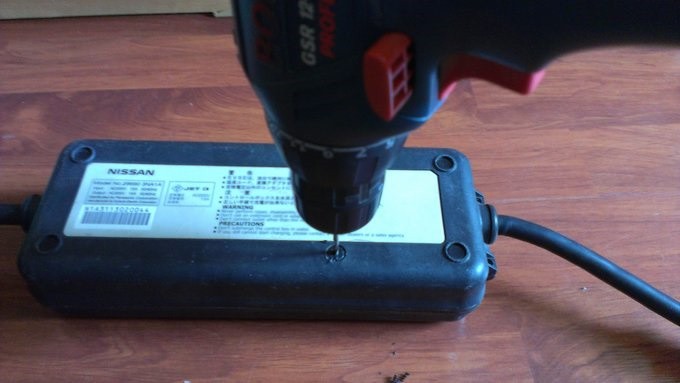
So, we’ve got this Japanese Nissan Leaf charger here, and it’s currently… well, lifeless. The problem? The plug’s incompatible with my setup, and frankly, the transformer inside the «brick» – that’s the power supply unit – looks a bit suspect. It’s time for some serious modification. This isn’t for the faint of heart, folks, so make sure you’re comfortable working with electricity before you even THINK about trying this at home. Safety first, always.
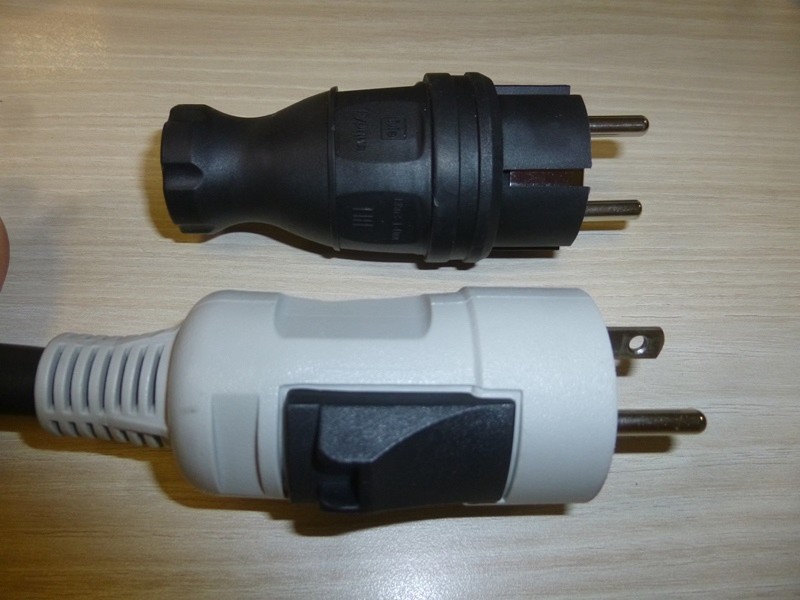
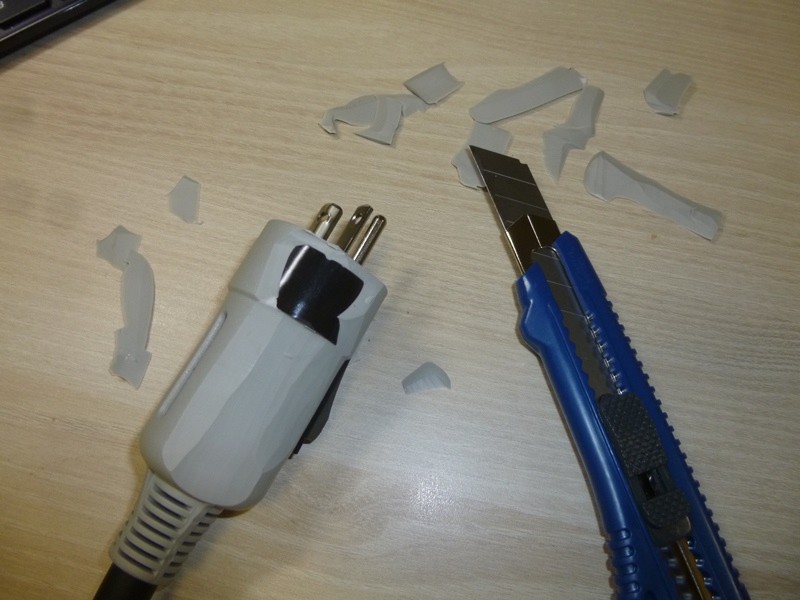
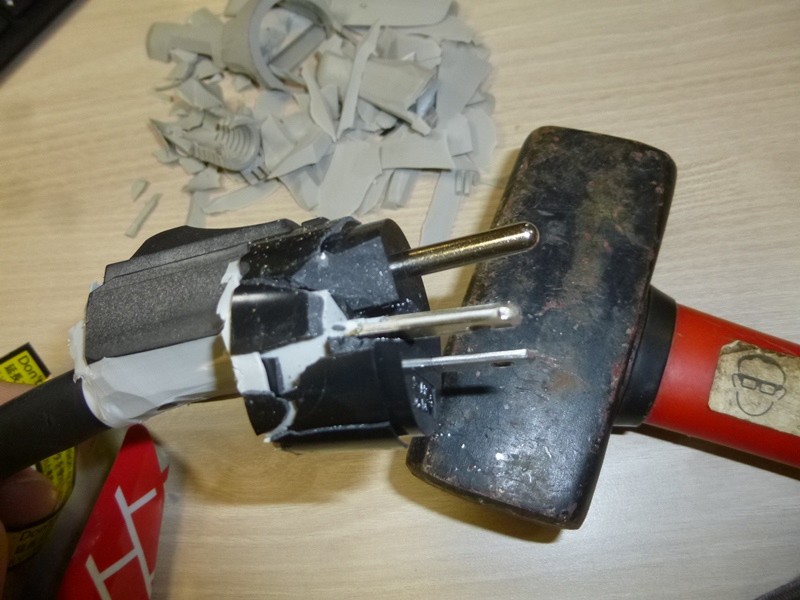
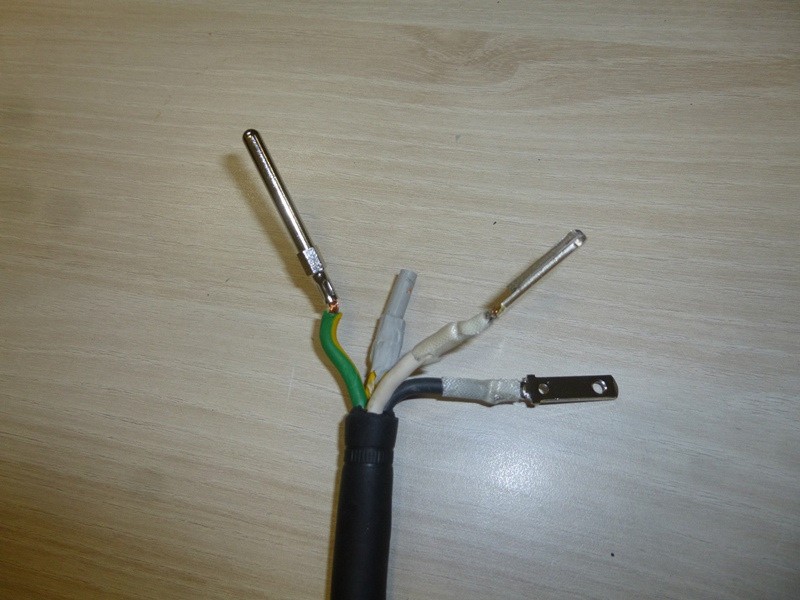
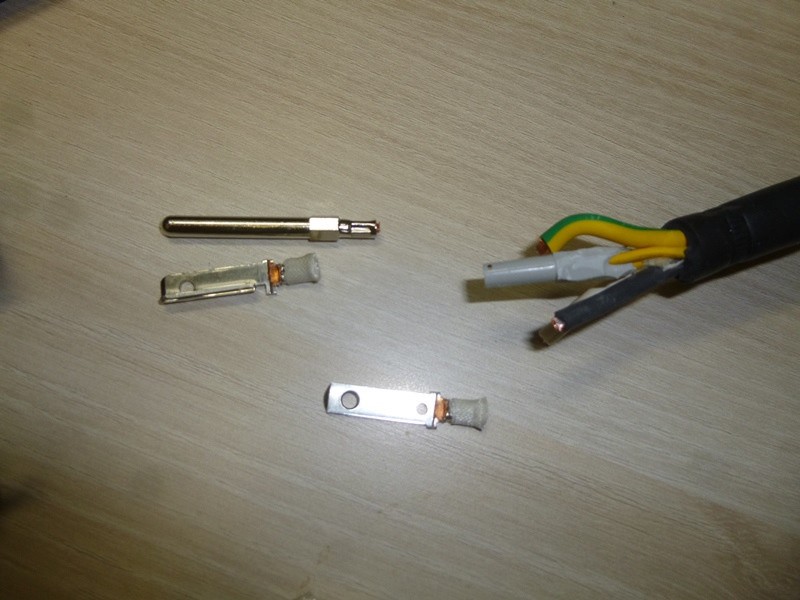
Let’s start with the plug. This Japanese plug is THREE-pronged, and it’s clearly not going to fit into my standard wall outlet. I’ve already sourced a replacement plug – a standard TWO-pronged one that’s compatible with my local electricity grid. The key here is to carefully remove the old plug. This involves some delicate work with a screwdriver, and you’ll need to be mindful of the internal wiring. There are THREE wires inside: a live wire, a neutral wire, and a ground wire. It’s absolutely crucial to identify each wire correctly before disconnecting anything. Get this wrong, and you risk a serious electrical shock, or worse. I’m using a multimeter to double-check the wiring before I even touch anything. Once the old plug is off, I’ll carefully solder the wires to the new plug, making sure each wire goes to the correct terminal. Again, double-checking with the multimeter is essential. Once the soldering is complete, I’ll use heat-shrink tubing to insulate the connections, providing extra protection and preventing any short circuits. This is a critical step; poorly insulated connections are a recipe for disaster.
Now, onto the transformer. This is where things get a bit more involved. The original transformer is rated for a specific voltage and current, and it’s clearly not suitable for my needs. I’ve already purchased a replacement transformer with the correct specifications – ONE HUNDRED TWENTY volts input and TWENTY-FOUR volts output, matching the requirements of the charger’s circuitry. This is a crucial part of the process; using the wrong transformer could damage the charger irreparably. Before I even think about installing the new transformer, I’m going to carefully examine the existing one. I’m taking detailed notes on its physical dimensions, the placement of the wires, and any markings that might be helpful. This will help me ensure the new transformer fits perfectly and is wired correctly. Removing the old transformer requires careful desoldering of the wires. Again, a multimeter is my best friend here, ensuring I don’t accidentally short anything. Once the old transformer is out, I’ll carefully install the new one, making sure the wires are connected to the correct terminals. I’m using the same color-coding scheme as the original transformer to avoid any confusion. After the new transformer is in place, I’ll carefully solder the connections, and once again, I’ll use heat-shrink tubing to insulate everything perfectly.
After all the soldering and wiring is complete, I’ll carefully reassemble the charger’s casing. This might require some gentle persuasion, but it’s important not to force anything. Once everything is back together, it’s time for the moment of truth: I’ll plug the charger into the wall and see if it works. Fingers crossed! If everything went according to plan, the charger should power up, and I’ll be able to charge my Nissan Leaf. But remember, if you’re not comfortable with electronics, don’t attempt this. This is a complex process that requires precision and a good understanding of electrical safety. If you’re unsure about any step, it’s always best to seek professional help. This whole process took me several hours, and it required a lot of patience and attention to detail. But seeing it all come together is incredibly satisfying.